Halloween Cupcakes |
Story location: Home / food_and_drink / |
| 31/Oct/2012 |
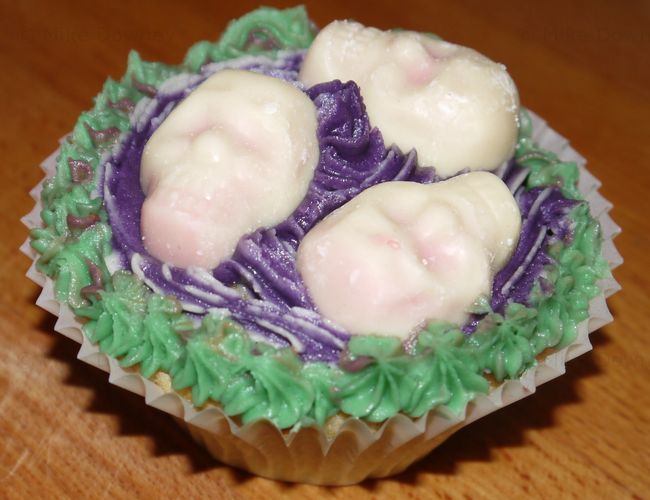
Emma baked and decorated some Halloween themed cupcakes today:


Pumpkin lantern
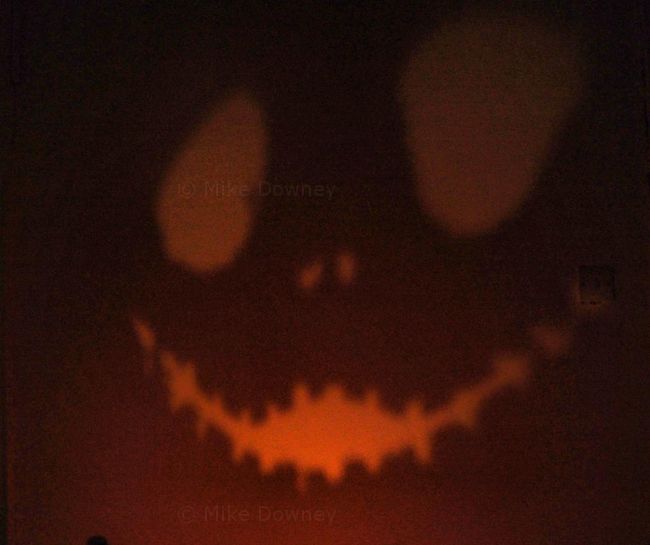
Casting a shadow on the wall.
Sourdough Ciabatta |
Story location: Home / food_and_drink / |
| 28/Oct/2012 |
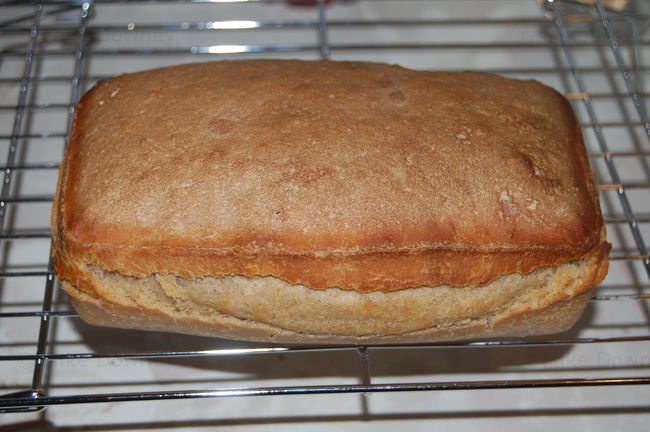
It's been several weeks since I last had a go at making bread, apart from our regular saturday night pizza. I decided to try a sourdough ciabatta recipe so I got my sourdough starter out of the fridge on wednesday and started feeding it twice a day to build it up ready to use, alternating white flour and wholemeal flour.
The recipe came from sourdoughhome.com but I reduced the quantities to make just one loaf.
I mixed the dough as soon as I got up this morning then left it to rise during the day. I only had 200g of starter so I ended up using all of it. I stirred flour and water back into the starter tub, and hoped that the small amounts of starter left in the corners of the tub would be enough for it to re-grow.
I added around 100ml of water, 20ml of milk, 10ml of olive oil and half a teaspoon of salt to the starter, then slowly mixed in 200g of bread flour. The dough was very sticky so instead of kneading by hand (which is what I normally do) I used the dough hooks on our food mixer to mix and stretch the dough.
I put the dough in an oiled silicone loaf tin to prove. It was quite a cold day so I ended up leaving it for about 6 hours. I baked it on our pizza stone at gas mark 7 for about 20 minutes. I started it off in the loaf tin then turned it out halfway through and put it back on the stone to continue baking (since the silicone loaf tin insulates the contents a bit so the top cooks while the insides stay a bit raw).
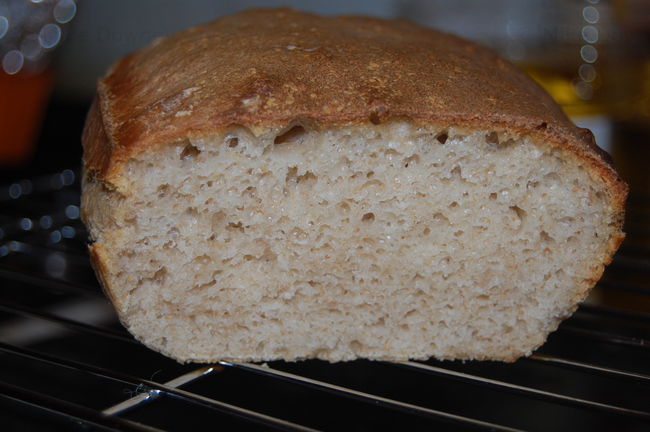
I think this might be the best texture of any of my sourdough breads so far. It rose quite well and had some decent air holes inside. Definitely a recipe to try again.
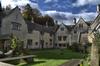
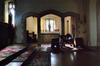
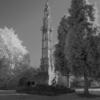
While Emma was at the Shurdington hamster show, I did my usual thing of going for a drive to nearby places for a bit of a walk and to take some photos. I went to the Great Witcombe roman villa (where I took some more Infra-red photos) and then to Prinknash Abbey where I had a look around the chapel then stopped at the coffee shop for some coffee and rather nice home-made cake.
Click on the thumbnail to view the image
Pancake Day |
Story location: Home / Blog / food_and_drink / |
| 21/Oct/2012 |
Today is Pancake Day (or to be more traditional, Shrove Tuesday). Our pancake tea consists of Curried Chicken pancakes for main course followed by a couple of dessert pancakes which vary depending on what we have in the house but nearly always includes a traditional lemon juice and sugar pancake. This has been our tradition for at least the last 6 or 7 years.
The pancake recipe has varied but the one we usually do now came from Delia Smith's website (original link has gone off-line, this is similar) and is fairly reliable.
In the past we have often used a tin of chicken in white sauce and added some curry powder but this year I cooked it from scratch by finely chopping 2 chicken breasts and frying them in a little oil. I made a thick roux and added curry powder, cayenne pepper and a little turmeric before stirring in the cooked chicken. The pancakes were filled with a couple of tablespoons of the chicken curry mixture then sprinkled with grated cheese before being rolled up and rapidly eaten.
We shared three dessert pancakes this year. They were filled with chocolate coated raisins, traditional lemon juice and sugar, and golden syrup.
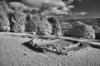
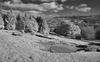
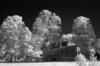
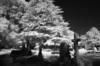
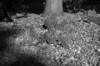
Experimenting with Infra-Red photography. |
Story location: Home / photography / gallery / |
| 14/Oct/2012 |
Many years ago I experimented with Infra-red photography using black and white film which was made by Konica and was sensitive to the longer wavelengths. The film was relatively insensitive to some visible wavelengths and I worked out that I could use an orange filter to get a decent Infra-red effect where foliage came out bright and the sky was dark. A couple of the photos are shown here.
Last week I decided to have another go but this time using my digital camera so I ordered a set of filters. These block visible light and only let through longer wavelengths. The sensors used in digital cameras are all sensitive to infra-red light but the cameras also include infra-red blocking filters, otherwise normal daytime photos will have a various amounts of IR light potentially bleeding through into the picture.
A bit of research on the web suggested that older cameras work better than newer ones since newer cameras have thicker or more effective filters. My Nikon D40 should work but will require fairly long exposures to compensate for the IR blocking filter.
This morning I took my camera, filters and tripod for a walk. The filters start at 720nm, which is deep red, right at the end of visible light. Looking through this filter, you can just about see bright light sources. The other filters are 760nm, 850nm and 950nm. These block all visible light and only let through progressively longer wavelengths.
Photos taken with the 720nm filter show a moderate IR effect, similar to photos taken with the Konica film I had previously used. Blue skies are darkened, a bit like a normal red filter with standard black and white film, and Foliage appears bright. With the longer wavelength filters, the sky gets darker which increases the contrast between it and any IR reflecting objects in the scene, such as leaves or stone.
I was surprised to find that the autofocus still worked using the 720nm filter. I focused at the start of each test then locked the focus on the lens (by setting the camera to manual focus but leaving the lens in autofocus) so I didn't check whether focus worked with the other filters. The camera's metering worked with all the filters but I had to add an extra stop or two of exposure compensation.
A tripod is essential when using these filters, since the exposure went from 1/200s with no filter, to around 1s with the 720nm filter, up to 15-20s with the 950nm filter. If I only carried one filter around with me, it would be the 760nm. The IR effect is stronger than the 720nm filter but the exposure is only slightly longer, at around 2-4 seconds.
Click on the thumbnail to view the image